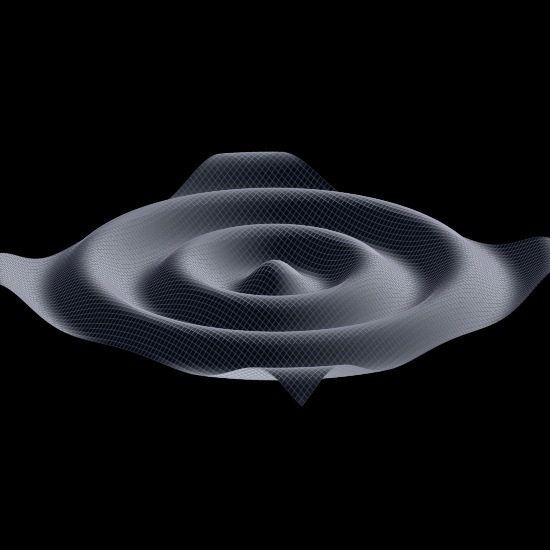
Rain Simulator
While I was visiting my high school a few weeks ago I got the chance to visit the fabled room 301, where many of the most focused programmers at Stuy tend to hang out. One of my favorite features of 301 and denizens is the constant influx of new and interesting projects. The people who hang around are always tinkering away at something or another, and this visit was no exception.
That day current senior and friend of mine George Vorobyev showed me a graphical demo he’d written in the past couple weeks that showed a discrete grid of vertical actuators behaving a lot like water. When he’d click, it would appear that a drop of water had landed, complete with the spring-like effect you see with a real water droplet. The visual aesthetic really reminded me of the inFORM project from MIT’s tangible media labs.

There were also a number of other effects that George had written up, but they all relied on the same flow physics, just with a different “god input”. For example, in one demonstration of a rippling wave, the god input is that each tick the flow-rate and height of the tiles on one edge is changed.
So I got to thinking how he might have done it, and how I could duplicate the effect. I think I asked him at the time, but I guess we got distracted, as all I remember him saying was that each tile had some sort of “flow momentum”.
Flow #
My first instinct was that each tile should have a horizontal flow and a vertical flow only, and like a river you would just measure the speed and direction that things were moving in at every point. Where this breaks down, though, is when you want to have an omnidirectional ripple, like a radial wave.
So each tile needs to have a flow in every direction. Since we’re discretizing the continuum into a finite set of tiles, we’ll just have them in the four cardinal directions.
We’re mostly done. All that’s left is flow generation and flow propagation, plus some tweaking of constant multipliers to get everything to look right. I expect that with some educated tweaking you could get it to look more like oil, or corn syrup.
Flow happens in every direction from high places to low places. Not really much else to say, aside from that the degree to which this is true should be affectable, since it’s sort of like the viscosity.
When something is moving in a particular direction it tends to continue doing so. When in a liquid or gas that motion is sapped by incidental collisions with particles along its path. These particles fly off in semi-random directions [citation needed], so when liquid is flowing not all of its momentum should continue in the same direction. Some portion (a quarter seems reasonable) of the flow should get added to the sides of the relevant tile.
Apart from that, it’s important to note that colliding flows should cancel each other out, rather than constructively or destructively interfering like sound waves do. The reason, of course, is that liquid flow is the transfer of matter in the direction of the wave, whereas sound movement is a movement of pressure energy, where the mass is staying largely stationary.
Widgets #
As a side-objective I wanted this project to be really modular, so I could tweak any part of the display without worrying about interference with other parts. To this end I decided to implement my own widgeting system, since it was something I’d never done before.
The program is logically split into two segments: the Simulation, which holds all the state and logic pertaining to the actual moving liquid, and the UI, which handles the display and user input. Connecting the two pieces is the Simulator, which handles frame timing and processes events thrown by the UI.
The UI has a bunch of rectangular widgets strewn across its surface, and to achieve effects like buttons it needs to pass MouseEvents down to the widget that got clicked. The simple way to do this is to iterate through the widgets on each click and check if the click is within the widget’s rectangle. This is constant time for widget insertion, but O(n) for clicks, which one expects there to be many more of.
After some more thinking I came up with an approach whereby a map from pixel coordinates to widget index is written to each time a widget is added. The map is really just a rectangular array of widget ids, where the indices of the array represent individual pixels on-screen. On adding a widget we fill the rectangle that the widget will occupy with that widget’s id. This allows us to pull off clicks in constant time at the cost of a slower widget insertion.
Writing this now it occurs to me that for a UI-design program where you want to be able to move widgets around, the first approach would be a lot cleaner. You wouldn’t need to deal with what was under the widget before you moved it. (You could probably get around that with the second approach by using a method like z-buffering, but that still seems messy.) Maybe in such an application you could normally operate by method one, but have a baking process that runs when you want to start using the UI you built.
None of this was really needed given the number of widgets I actually had, but it’s interesting to think about. It also comes with the added benefit that when I actually do need efficiency, maybe in a different project, I can pull the solution out of my head (in constant time! :D).
The final result looks like this:
I hope this was cool. You can check out the project on GitHub if you want to see the source.
